
GitLab Policy Finding Approvals
Overview
To successfully pass through the pipelines, product teams must adhere to specific criteria set by P1's MDO and CAT teams.
- The pipelines utilized by Party Bus employ SonarQube and GitLab SAST gate check scripts to ensure that only high-quality, secure code is deployed to our environments.
- Our ATO mandates that product teams address all findings rated above Minor/Low.
- Our ATO also mandates, per NIST DevSecOps control, that we provide mechanisms for approval or gate checks before pushing code to staging (i.e., pushes directly to the default branch are discouraged/disallowed).
SonarQube and GitLab SAST will be updated as new versions of each tool become available. These updates may affect the findings in our pipelines, as the rulesets in both tools are regularly adjusted and improved. We have observed that updates occur more frequently with SonarQube.
NOTE
Teams can run SonarQube locally to catch findings before the pipeline, and prepare for new versions of SonarQube and rulesets coming out by tracking their updates on the SonarQube documentation.
SonarQube
Software Qualities: Security, Reliability, and Maintainability
SonarQube classifies every rule – and therefore every issue – under one of three high-level software qualities that align with Clean Code principles:
Security: Protection of your software from unauthorized access, use, or destruction. Security-related issues (for example, vulnerabilities or certain bugs) can expose sensitive data or allow attackers to execute malicious code and should be fixed immediately.
Reliability: A measure of how well the software can continue to perform its intended functions under stated conditions for a stated period of time. Reliability issues (bugs) can cause production crashes or unpredictable behavior.
Maintainability: The ease with which code can be understood, repaired, and improved. Maintainability issues (code smells) slow down development and increase the likelihood of future defects.
Severity Levels
Each issue is also assigned a severity that represents its potential impact:
- Blocker – Significant probability of severe unintended consequences; fix immediately.
- High – High impact on the application; fix as soon as possible.
- Medium – Moderate impact.
- Low – Low impact.
- Info – No expected impact; informational only.
All issues with a severity higher than Info/Low must be fixed, or you must request a formal exception.
Security Hotspots
Security hotspots identify sections of code that are sensitive to security issues and require manual review by the developer. After reviewing a security hotspot, you may determine that there is no threat, or you may need to apply a fix to secure the code. Unlike typical issues, security hotspots necessitate careful examination. All security hotspots must be either resolved or formally requested for an exception.
SonarQube Branch Analysis and Whitelisting Behavior
P1’s recent upgrade to the SonarQube Enterprise Edition introduced support for branch-specific analysis. Previously, all branch results were uploaded to a shared location, and SonarQube would only display the most recent results. This approach caused vulnerabilities to appear and disappear depending on which branch was last analyzed.
With branch analysis, each branch keeps its own results, so the findings match the code in that branch. This separates the results for more reliable visibility into vulnerabilities.
Branch Synchronization
Each repository has a default (main) branch in SonarQube. When a new branch is created and scanned, SonarQube copies issues from the main branch. Later issues or whitelists added to the default (main) branch do not automatically copy. See the SonarQube Branch Synchronization Documentation for more details.
Pipeline Behavior
Pipeline behavior differs between default and non-default branches.
Default Branch (Main)
- Authorized to deploy to our Kubernetes clusters.
- SonarQube and dependency-check jobs block deployments if findings exist, preventing you from deploying vulnerable code.
- Product teams must fix all findings by remediating the issue or requesting a whitelist from the CAT before proceeding.
- Developers cannot commit directly to the default branch. Instead, fix issues in non-default branches and merge those changes into the default branch. If an issue cannot be fixed, note it in the MR, and be prepared to submit a whitelist request for the default branch after the MR is merged.
Non-Default Branches
- Run SCA jobs, but do not block pipelines if they fail. Jobs with SonarQube-related findings will fail with warnings (yellow). Product teams need to be aware of findings and attempt to fix them when possible.
- Whitelisting non-default branch findings is redundant for both the product team and Cyber/CAT. Do not request whitelists for these branches.
- Teams should remediate issues on these branches, then merge fixes into the default branch. If an issue cannot be fixed, note it in the MR and be ready to request a whitelist on the default branch after the merge.
Whitelisting Behavior
Whitelists in SonarQube are branch-specific. A vulnerability whitelisted on one branch will not automatically be whitelisted on other branches, even if the same issue exists across them. This can result in product teams encountering the same vulnerability repeatedly after merges.
To reduce redundancy, teams should focus whitelist requests on their default branch. Requesting a whitelist for findings on non-default branches may temporarily clear pipeline warnings for that branch, but those findings will reappear on the default branch once the code is merged.
Currently, SonarQube offers synchronization options to help align issues across branches; however, these features are not supported within our current processes. Party Bus is investigating solutions such as re-enabling pull request (PR) analysis and testing the New Code Definition alternative. Instead, product teams should fix issues on their non-default branches whenever possible. If the issue can’t be fixed, note it in the MR. After the merge, submit a whitelist request for the default branch.
Best Practices
- Treat the default branch as the source of truth for security findings.
- Perform remediation work in non-default branches, then merge the fixes into the default branch. If an issue cannot be fixed, document it in the MR and be ready to submit a whitelist request for the default branch after merging.
- Focus whitelisting and remediation efforts on the default branch to avoid duplication.
- Fix issues early in non-default branches, but only whitelist on the main branch.
- Always verify that whitelisted findings remain valid after merges or resynchronization.
For detailed instructions on submitting a whitelist request, refer to Requesting an Exception (SonarQube and GitLab SAST). Submit whitelist requests here:
GitLab SAST
GitLab SAST is a newer Static Analysis tool that Party Bus will be leveraging to improve our security and user experience when running automated security checks. GitLab SAST is comprised of two types of scanners: GitLab Advanced SAST and Semgrep SAST. For most purposes, GitLab Advanced SAST will be the primary scanning tool.
For more information on what is covered with GitLab SAST, look to the GitLab SAST public template.
Merge Request Policies: Purpose and Enforcement
To ensure secure and high-quality deployments, Party Bus is adopting a strict MR policy for all code changes to default branches (e.g., master/main) as of September 2025. This means:
Direct pushes to default branches are no longer allowed. All changes must be made through an MR targeting the default branch. This aligns with ATO and NIST DevSecOps requirements for pre-deployment gate checks and helps prevent new vulnerabilities from reaching production.
GitLab SAST is enforced at the MR stage. When you open an MR, the pipeline will automatically scan your changes for vulnerabilities.
How the Policy Works
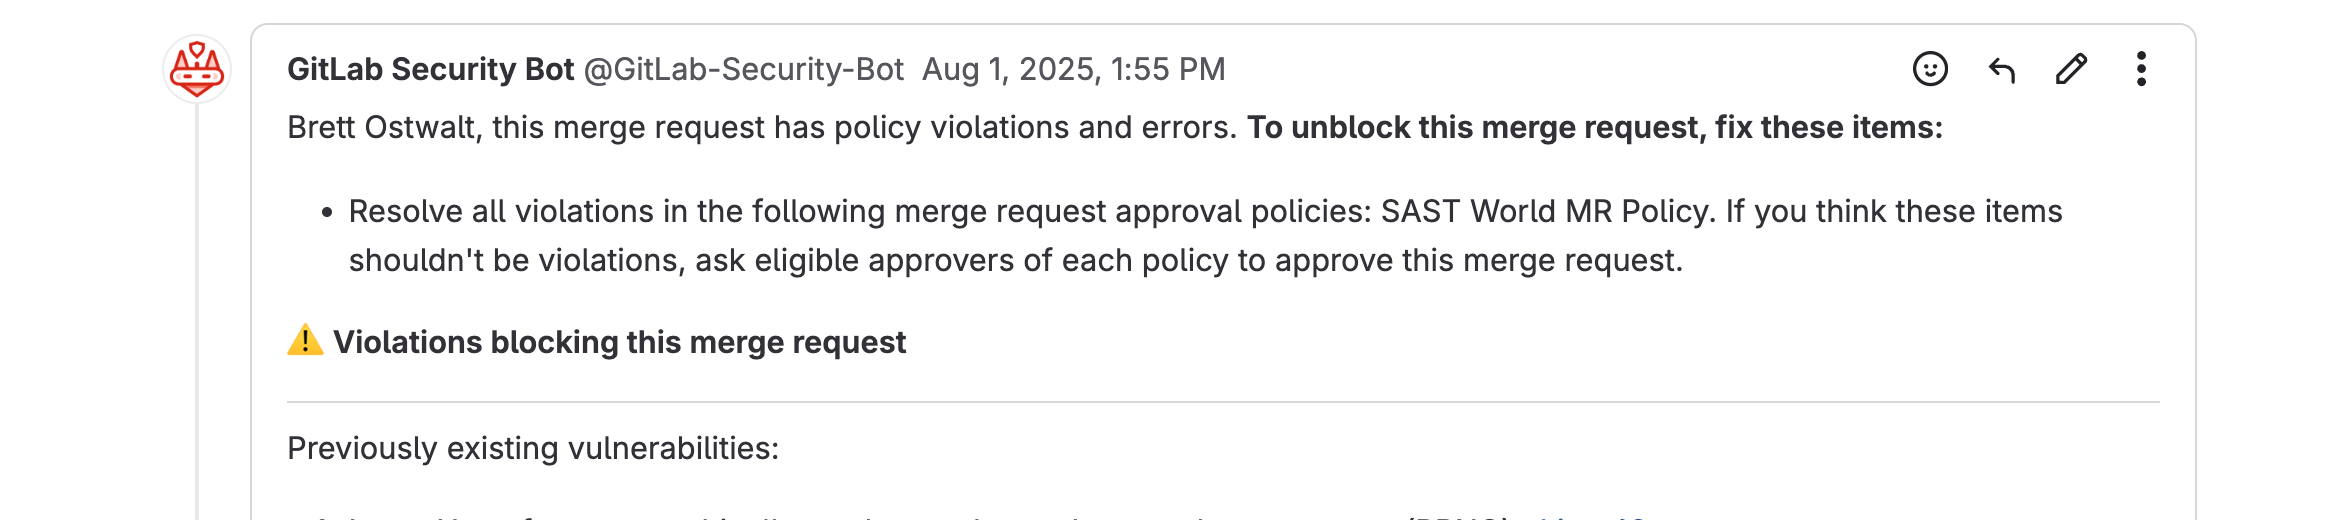
New Vulnerabilities: The MR policy will block merges if any new Medium, High, or Critical vulnerabilities are detected. Developers must remediate these issues or request a whitelist exception before merging.
Existing Vulnerabilities (Adoption Phase): During the initial rollout, Party Bus will also block merges if the project has any existing vulnerabilities in the default branch. This is a temporary measure to encourage teams to address outstanding issues as we transition to the new workflow.
Summary Table
| Phase | What Blocks a Merge? |
|---|---|
| Adoption Period | Any vulnerability (new or existing) |
| Steady State | Only new Medium/High/Critical vulnerabilities |
Rationale and Workflow
BLUF
GitLab SAST is not a pass/fail job. We are using the MR strategy going forward to better align with best practices.
Why MRs? Requiring all changes to go through an MR ensures that every code change is scanned and reviewed before it reaches the deployment branch. This process helps catch and address vulnerabilities early.
Key Points:
- Development branches are for new code.
- All merges to deployment branches must go through an MR.
- All new vulnerabilities are identified and gated at the MR stage.
- During the adoption phase, existing vulnerabilities are also enforced.
Looking Ahead: After the adoption phase, enforcement will focus on new vulnerabilities only. Party Bus will also consider applying this enforcement model to other security tools in the future.
In Summary
All code changes must go through an MR, and pipelines will block merges on any vulnerabilities during the adoption phase. This ensures that new vulnerabilities are caught and addressed before deployment, and that existing issues are remediated as part of the transition. Please review the additional guidance for viewing and sorting findings for more information on how to navigate findings.
Additional Guidance on Pipeline Scope and How to Create an MR Policy
Because of the variation in customer workflows, especially given the existing policy that allows any maintainer to protect branches for pipeline runs, Party Bus is leveraging multiple paths to give developers the best experience when working through the Party Bus process. Additionally, Pipelines will need to reach completion for merges to happen. As such, we have created several paths for adoption.
Existing Workflow: Running MR pipelines on protected branches. Customers can protect branches if they are maintainers or set up wildcard rules to protect branches so that their developers can automatically run pipelines when going through the development lifecycle. When the developers in question are ready to merge to the deployment/default branch, they can create an MR. As such, this MR may already have pipelines that have been run against it and will be able to evaluate the SAST rules for the merge criteria.
New Workflow: Running MR pipelines on unprotected branches. Customers can also create pipelines that run against unprotected branches by creating an MR with an unprotected branch. This is advantageous because it allows customers to only create pipelines when they are ready to merge against the default branch. Otherwise, any development pushes that happen do not trigger pipelines. Once the MR is created and the pipeline gets kicked off, the rules are evaluated after completion. This will run a full pipeline
Eventual New Workflow: Running an ABBREVIATED pipeline on an unprotected branch. We do recognize that some customers are used to merging directly to the deployment branch or have some lengthy pipeline runs, so we are providing a way to run only GitLab SAST as a part of the new requirements. We are still working on a process that allows customers to have some control over this aspect. We will release guidance before final enforcement, if not during the soft enforcement/early adoption period.
NOTE
If you are running unprotected branches and have custom variables in your project CI/CD variables, you must leave those variables unprotected. They can still be masked to obscure sensitive data.
Significant Changes
What is a Significant Change Finding?
A significant change finding indicates a code change has been made that requires P1 approval before the change can be merged.
These types of findings have been added to:
- Validate major changes to apps go through the proper security review process to ensure deployed images can maintain their CtF, and
- Help expedite and remove some of the burden surrounding the security review process when making app changes.
Types of Significant Changes
There are currently two main types of significant changes that will trigger MR security approvals.
- Significant changes to the base image
- This indicates the base image has significantly changed from what was used in the previous release.
- In other words, the base of the image has changed, or the image has changed completely.
- Simple version bumps to update your base image should not trigger this finding.
- Changes to completely different base images will trigger the finding and require P1 approval.
- Significant changes to images in the manifest
- This indicates one of the following changes in the manifest:
- An image has been entirely added/removed from your deployed app.
- An image name has been changed.
- An image you are now using has significantly changed from what you previously had in place (change in image in the manifest).
- This indicates one of the following changes in the manifest:
Identifying Significant Change Findings
Depending on the project, these types of findings may be found in MR pipelines. Initially, enforcement for these types of findings will be turned off. However, P1 approval will be required for the MRs to the default branch once enforcement is enabled.
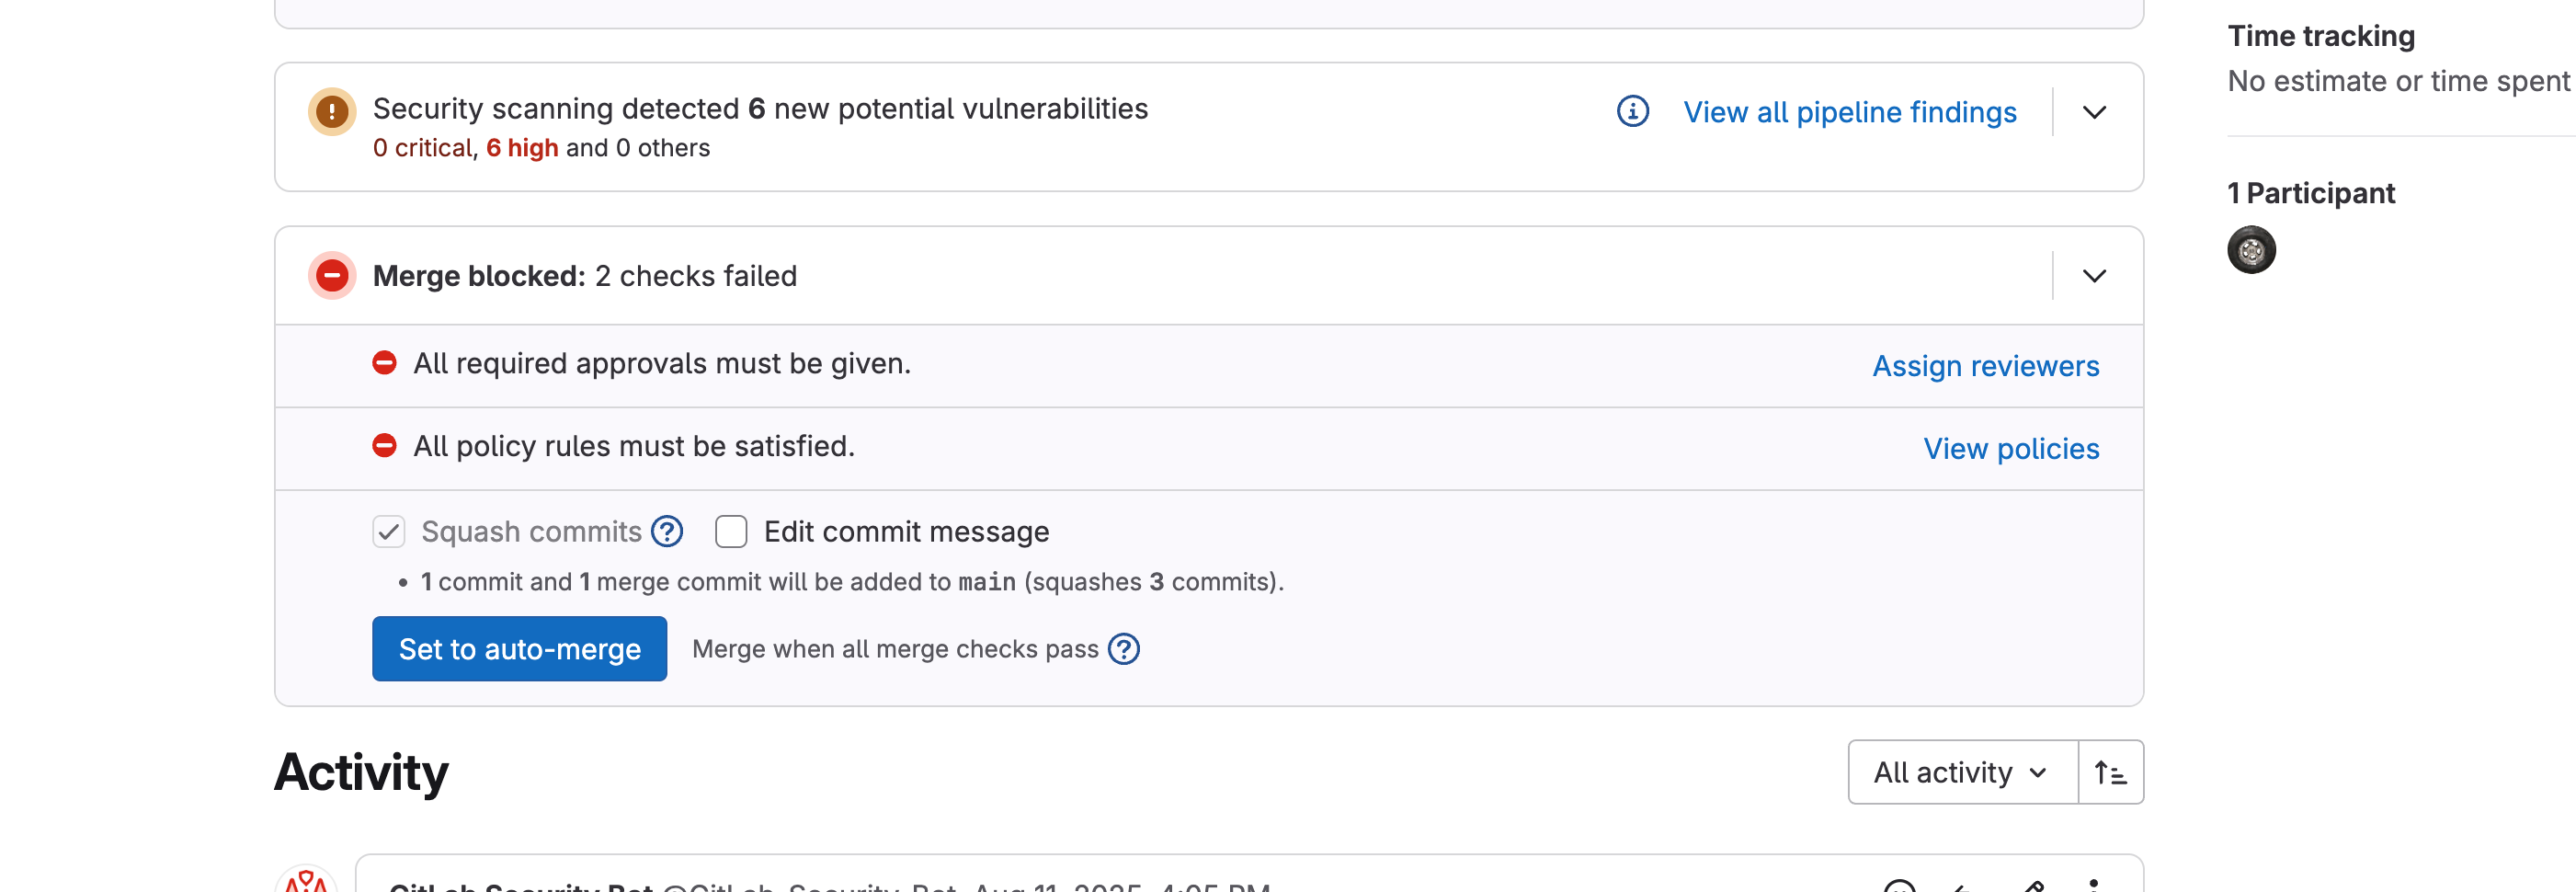
These types of findings will show up as Container Scanning findings under the Security Scanning section of your MR.
You will see something like:
Container Scanning detected 1 new potential vulnerabilityDepending on the type of significant change, the finding will vary. As with SAST, selecting the finding displays generic information about it.
Significant Changes to Base Image
For this finding, you should see something like:
High Significant Change in <image-uri>:base-imageNote: This check may show up in all MR pipelines, but will only actually be evaluated for Image Build pipelines when there have been changes to the base image.
Significant Changes to Images in the Manifest
High Significant Change in <image-uri>:manifest-fileNote: This job will only run in MR pipelines for the Manifest Project.
Examples of Significant/Insignificant Changes to Images
Example 1 (Significant change)
- From: registry1.dso.mil/ironbank/opensource/python:v3.12
- To: registry1.dso.mil/ironbank/google/golang/ubi9/golang-1.24:1.24.7
Example 2 (Significant change)
- From: registry1.dso.mil/ironbank/opensource/nodejs/nodejs22:22.13
- To: registry1.dso.mil/ironbank/opensource/nodejs/debian/nodejs:22.17.1
Example 3 (Insignificant change)
- From: registry1.dso.mil/ironbank/opensource/nodejs/debian/nodejs:20.19.4
- To: registry1.dso.mil/ironbank/opensource/nodejs/debian/nodejs:22.17.1
Example 4 (Insignificant change)
- From: registry1.dso.mil/ironbank/opensource/python:v3.12
- To: registry1.dso.mil/ironbank/opensource/python:v3.13
Resolving Significant Image Changes
INFO
Do not dismiss findings yourself. The MR policy ignores the dismissed state and instead relies on necessary approvals on the MR. If you dismiss your own findings, they will be hidden from view.
Whether it be a significant change to the base image or an image used in the manifest, you will be required to go through the following process.
- Ensure that the image change is necessary.
- If you intend to only update the image, perform a version bump of the tag to avoid triggering the finding.
- You can go to Registry1 to search for your image and find the latest version tags available for use.
- If you do determine you need to change the image, get P1 approval by submitting a GitLab Policy Finding Approval Request
- For
Summary, enter one of the following (whichever is appropriate in your case):- Base Image Change Approval
- Manifest Image Change Approval
- Fill in the remaining fields according to your specific case and then hit
Create. - Once the CAT reaches out, work with them to mitigate/address any risk identified by the change in image.
- For
Requesting an Exception for SonarQube
To request an exception for findings related to SonarQube, follow these steps:
- In SonarQube, add a comment to the issue that explains why the finding is a false positive or does not require fixing.
- Submit a SonarQube Whitelist Request to get the exception approved. If multiple findings need to be addressed, include all issues in the same request ticket.
Requesting an Exception for GitLab SAST
1. Kick Off the MR Pipeline
Start an MR using one of the workflows described above (protected branch, unprotected branch, or abbreviated pipeline).
2. Review the SAST Results
After the pipeline finishes, review any vulnerabilities reported by GitLab SAST.
WARNING
Do not dismiss findings yourself – the MR policy ignores the dismissed state and instead relies on necessary approvals on the MR. If you dismiss your own findings, they will be hidden from view.
Scenario A – New Findings
Click Show Details (ˇ) to expand the list.
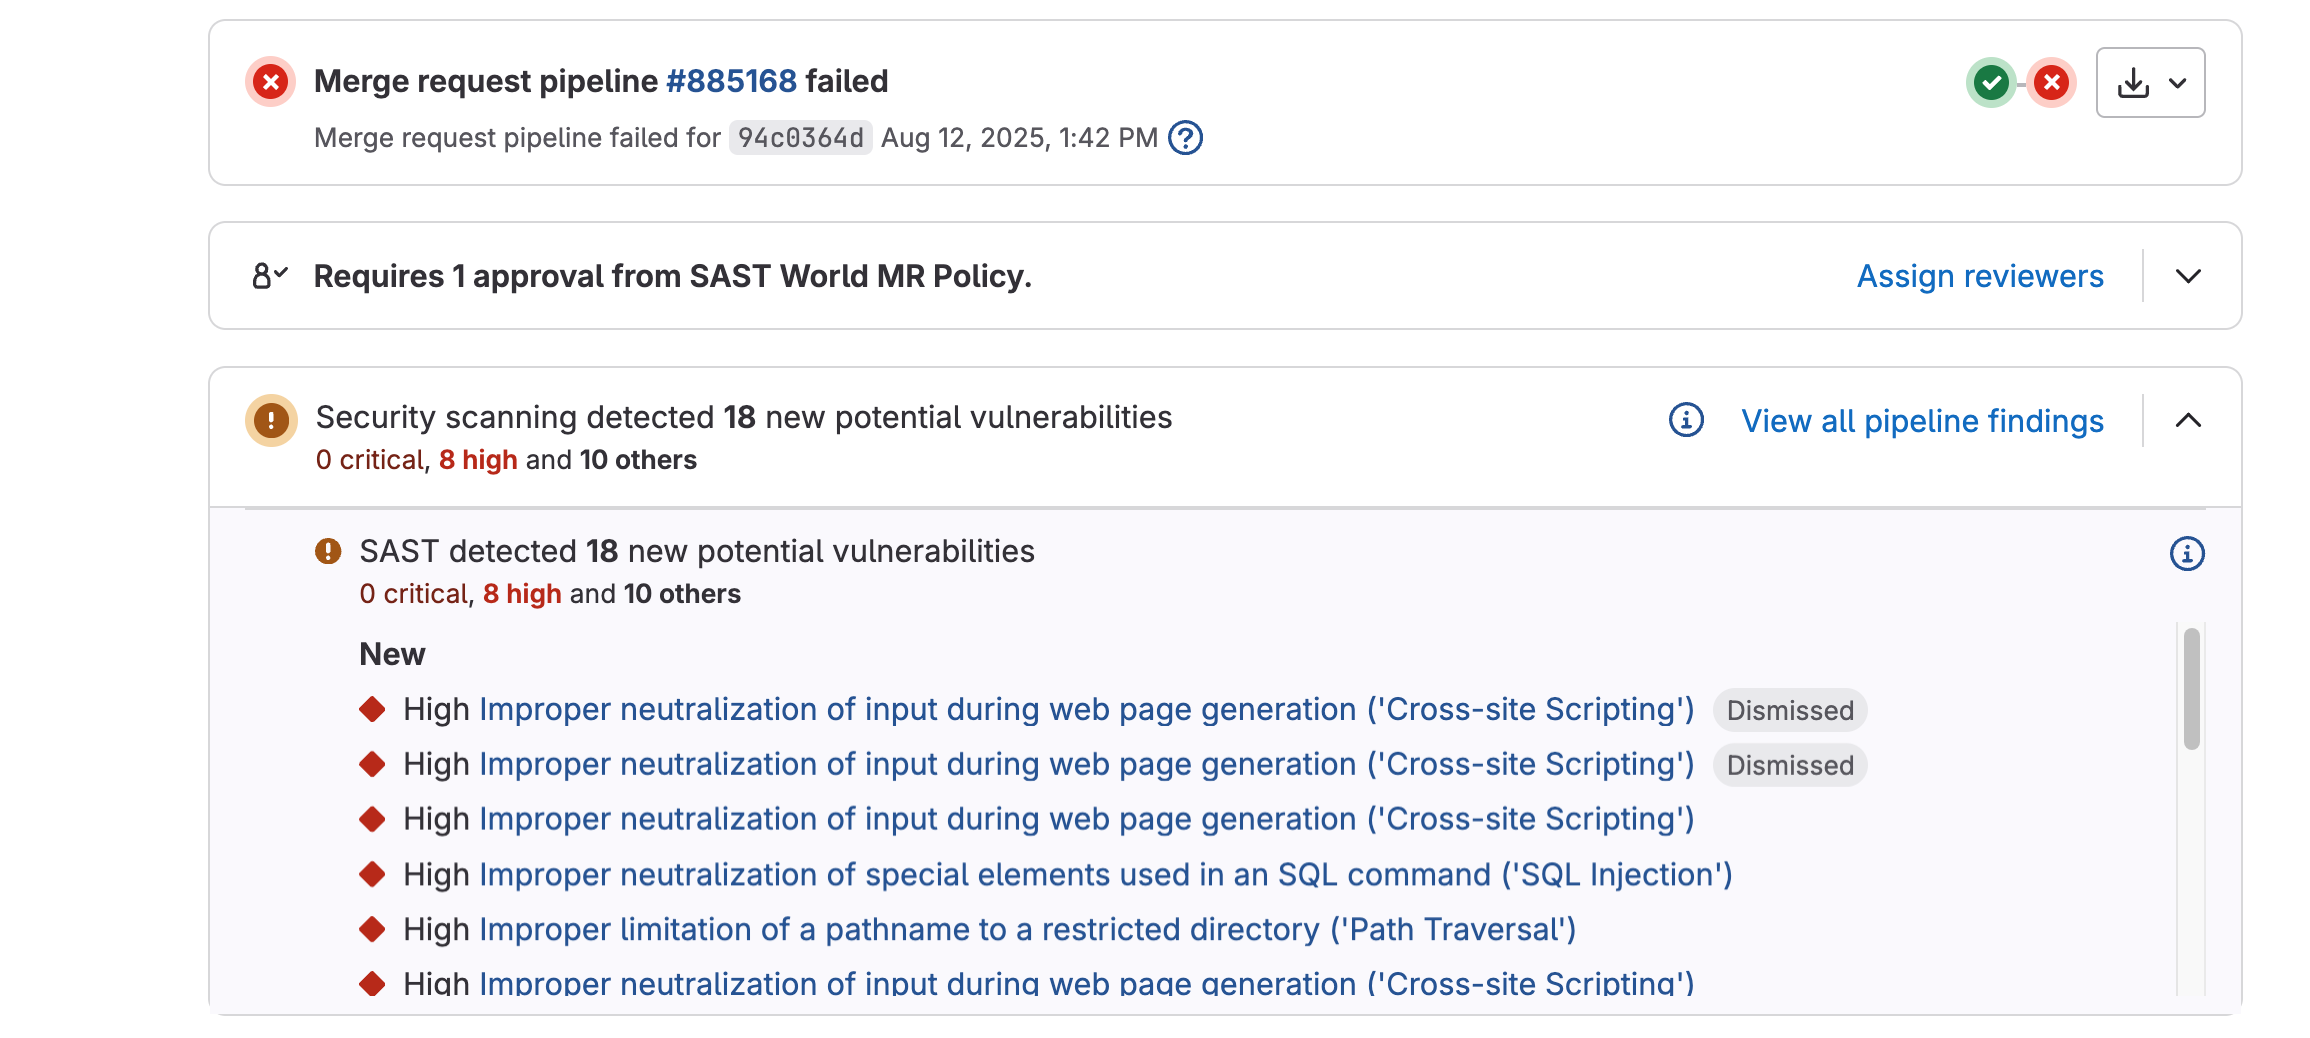
Inspect each finding to decide whether it is a true issue or a false positive.
For findings you want whitelisted, scroll to the bottom of the vulnerability window and click Create Issue.
In the newly-created issue, add an explanatory comment and copy the issue URL.
Repeat for every finding you wish to whitelist; you will include each URL in your Cyber ticket.
Scenario B – Existing Findings (Initial Adoption)
Navigate to Secure → Vulnerability Report in your project sidebar. (There is guidance below on how to navigate these findings with more granularity if needed)
Select one or more findings using the check boxes.
In Select Action, choose Attach to new issue (or Attach to existing issue).
Click Create Issue (blue button on the far right).
In the issue, add justification/comments and note the issue URL(s) for your Cyber ticket.
Heads-up: Both scenarios can occur together when an MR introduces new findings while existing ones are still present.
3. Submit a Cyber Whitelist Request
Open the GitLab Policy Finding Approval Request .
Provide the MR link and every issue URL created in the steps above.
Use the drop-down to indicate whether each request is for New or Existing findings. (See above for explanation if needed)
Supply any additional context that will help the Cyber team act quickly, then click Submit.
4. After Submission
The Cyber team will either approve the whitelist request or ask for additional information/remediation.
Additional Guidance for Viewing and Sorting Findings
If the MR view for findings proves to be difficult to navigate or utilize, you can always go to the full pipeline or project view.
Project Vulnerability Reports
Project vulnerability reports are available in your Vulnerability Reports. This URL is essentially https://code.ilx.dso.mil/your/project/path/-/security/vulnerability_report.
Filtering by vulnerability is possible by using the filter bar, clicking into it, and then selecting the resulting options. For all possible options, please use the document linked above.

Additionally, you can sort these findings based on various states. As stated above, dismissed findings will not show in the default view, but you can use the drop-downs to un-filter them. Or you can use the URL above with some extra filtering. Ex:
https://code.ilx.dso.mil/your/project/path/-/security/vulnerability_report/?state=CONFIRMED,DETECTED,DISMISSED.Any findings that have been resolved due to positive actions by the developer or even some environmental factors by our team to fine-tune results can also be sorted and viewed for historical purposes. URL is
https://code.ilx.dso.mil/your/project/path/-/security/vulnerability_report/?state=RESOLVED.
Viewing Results for Your Pipelines
Follow these instructions for guidance in navigating the user towards the pipeline findings.
Pipeline results links should look something like the following:
https://code.il2.dso.mil/platform-one/devops/hello-pipeline/sast-world/-/pipelines/888375/security.These findings will represent ALL SAST vulnerabilities found in a pipeline, but anything that has been dismissed as a result of previous whitelisting will not show by default. This includes findings whitelisted as a part of the Existing Findings workflow and the New Findings workflows outlined above.
Similar to the main project vulnerabilities dashboard, you can filter by various statuses; however, instead of an open filter bar, you will be presented with a set of drop-downs.
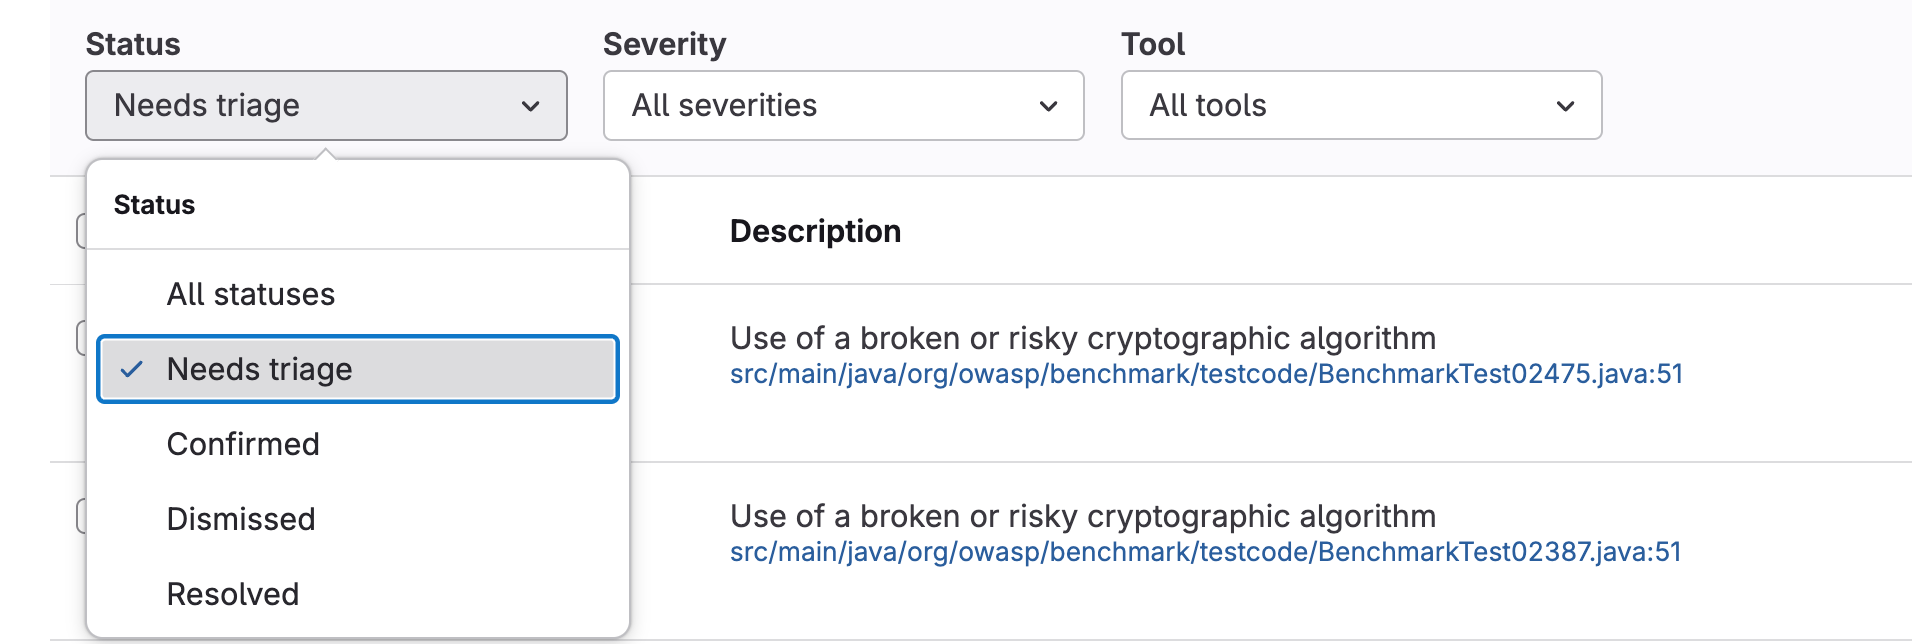
Resolved Findings
If you remove all filters from the vulnerability report, you may also see resolved findings. These are findings that your team either fixed or were automatically resolved due to configuration changes on the Party Bus side. These are not evaluated during the MR policy process and are merely meant to show as a historical record of things that were fixed or went away.