
pgAdmin
Overview
pgAdmin offers a way for product teams to manage their own data. pgAdmin is deployed as a web application and is accessible via a web browser. It is a powerful tool that allows teams to view and edit data, run queries, and manage databases.
In staging, we offer teams full admin access (i.e., create, read, update, and delete) to your database in IL2, IL4, and IL5.
In production, teams are limited to read-only access in IL2, IL4, and IL5.
Request for pgAdmin
You can request to have pgAdmin installed in your namespace by submitting a pgAdmin Request . Submit one request per application deployment environment. For example, if your application is deployed in IL2 staging and IL4 production, you would put in two Help Desk tickets.
Setup and Intended Usage
The server is preloaded for you. You cannot connect to other PostgreSQL servers. There are two different setups, one for multi-tenant and another for single.
A username and password for pgAdmin will be generated and communicated over IL4 or IL5 (whichever is more appropriate). More pgAdmin users cannot be created; a team is intended to use one shared account.
Multi-Tenant (Staging)
Much like other multi-tenant structures, like an apartment building, the multi-tenant RDS server is a shared resource. A product team is typically assigned one database, among many other teams' databases, within a single PostgreSQL server. Because of this, customers will not be able to use pgAdmin in its full capacity.
Rules/Restrictions:
- Customers will not be able to create new users.
- Customers will not be able to create new databases.
Please note that you will only have read-only in production environments.
Single Tenant (Staging)
For teams with a single-tenant setup, full control over a single server is granted. Your pgAdmin account will be linked to the single server's superuser account.
Unlike the multi-tenant setup, you will have the ability to create users within PostgreSQL (not pgAdmin) and create databases.
Please note that you will only have read-only in production environments.
Features
Backups and Restores
Backups are tricky, but to understand why, let's first review PostgreSQL's server structure.
Server
└── Databases
    └── Schemas
        └── Tables
When a database is first provisioned for a team in the multi-tenant server, much of the setup is done at the database level and higher. That setup is done by the multi-tenant's maintenance user, who will have more privileges than the user tied to your pgAdmin instance. With that said, you will be able to make a backup at higher levels, but you will not be able to restore from that backup.
Backups done at the database level or higher will fail upon restoration, as it will try to execute SQL commands that need to be done by the maintenance user.
Backups should be done at the schema level or lower and should mainly focus on tables, indexes, foreign keys, and other resources contained at the schema level.
Backups
To do a backup, follow these instructions.
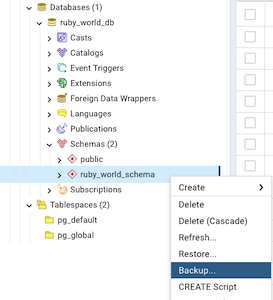
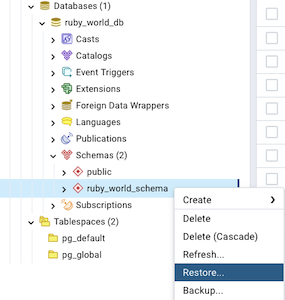
Right-click on the schema in the Object Explorer and click Backup. A modal window should pop up.
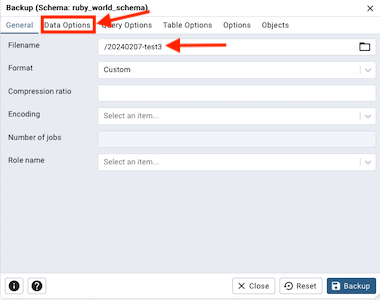
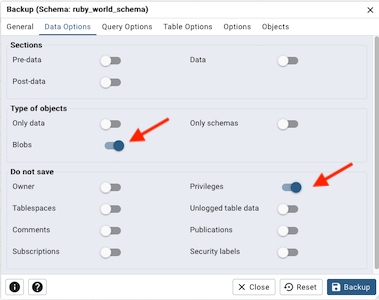
Fill out a Filename (all other fields can be left blank) and then click on Data Options, the second tab in the modal window. In Data Options, make sure two options are enabled here:
- Type of objects - Blobs
- Do not save - Privileges
Click on Backup at the bottom right.
Note
By default, the backup will be saved to a location inside the container. (You can download it onto your local machine. See below.)
Reminder
We do not want to take a backup at the database level. These will fail to restore. For more info, see above.
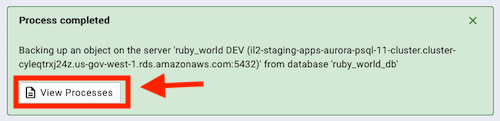
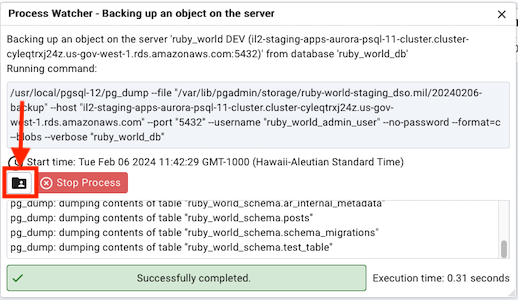
You should see a pop-up at the bottom right of the screen once the backup has completed. Within the box, click on View Processes.
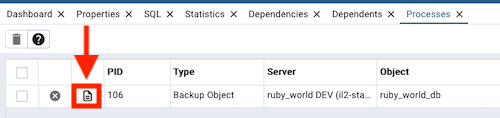
This should show a list of processes, and one of those should be of type Backup Object. To the left of the row, click on the page icon. This will bring up another modal window.
Access the Storage Manager.
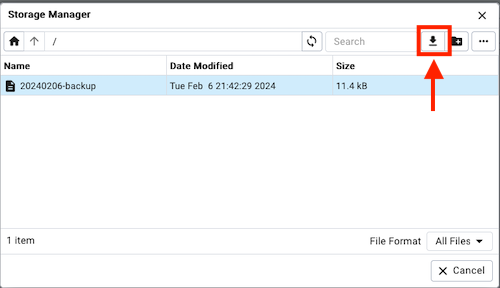
Within the Storage Manager, you should see the backup you created. Click on your backup. The top-right of the modal should have a download icon. Once you click on that, it should download onto your local machine.
Please note the following:
- Backups and restores only work in staging (not production).
- Backups will not be stored permanently. Please download and store backups elsewhere.
Restores
To do a restore, follow these instructions.
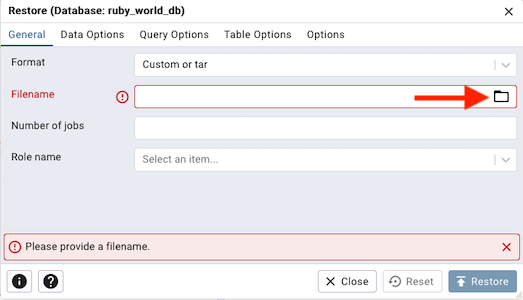
Right-click on the schema again in the Object Explorer and click Restore. Once the modal window opens, it will prompt you to pick a backup file. Click on the file icon in the Filename field.
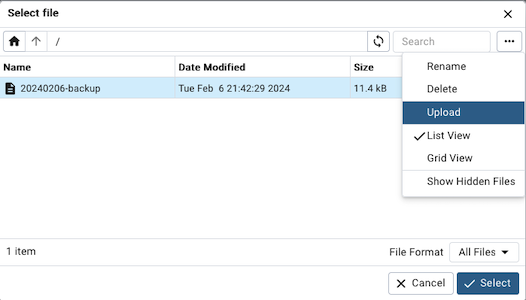
Click on the ellipses at the top right corner and click on Upload.
This should give you the option to drag files in from your local machine. Once you drag in the file, it should upload automatically.
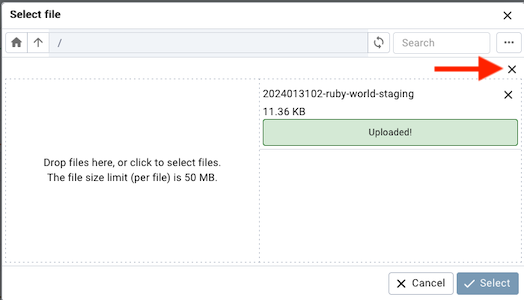
Close the sub-window in the file browser window, and you should now see your backup in the list of selectable backups.
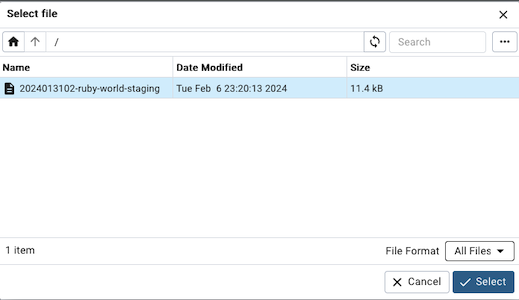
Select your backup, and in the restore window, click on Restore.
Note
If you are restoring from a backup made outside of the Party Bus environment, it should not contain any SQL commands that alter or create objects in levels higher than the schema. The backup should mainly focus on tables, data population, and other lower-level objects that are contained within the schema. See above.
For more information on backups and restores, please refer to the official pgAdmin documentation on backups and restores.
Common Issues
You may run into some issues logging in if you are using Chrome and/or an adblocker (e.g., uBlock). If you are unable to log in, please either switch browsers (e.g., Firefox) and/or turn off your ad blocker.